Creating a custom envelope
Envelopes are Toit's way of packaging the native firmware and Toit containers together. After going through an extraction process, this is what is flashed to devices.
Envelopes are designed to be modified, so that Toit containers can be added or removed from them. This approach makes it possible to download precompiled envelopes, where the native firmware has been built for you, and then add your own Toit containers to them.
Toit already provides multiple envelopes at the envelopes repository. However, if you need a different configuration of the native firmware, then you might need to create your own custom envelope.
This tutorial will show you how to create a custom envelope using
GitHub actions. This approach is great for minor changes, like adjusting the
sdkconfig file. See the local tutorial for
information on how to create a custom envelope locally on your machine.
Fork
Start by forking the envelopes repository, and check it out on your local machine. See GitHub's forking instructions.
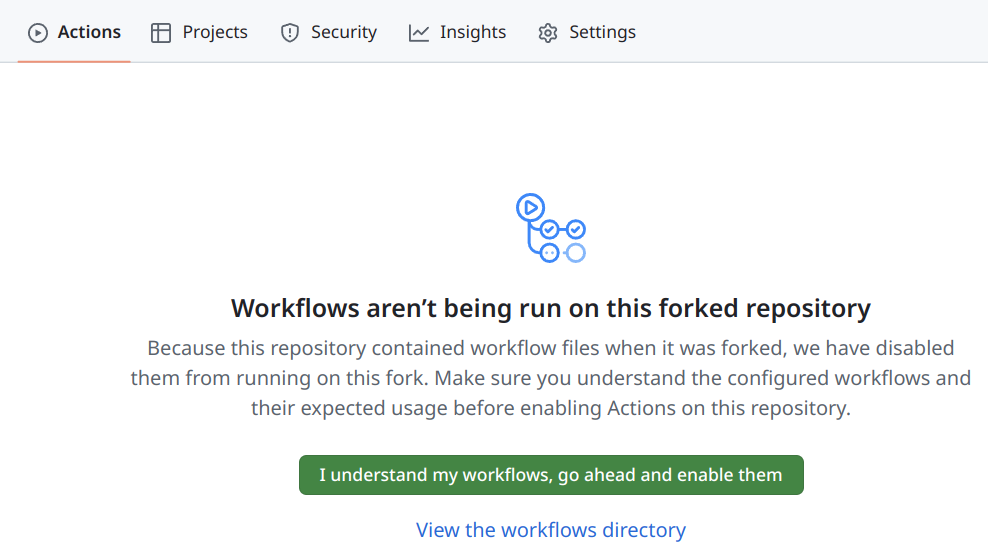
Enable Workflows
Go to the actions tab of your forked repository, and enable workflows. This will allow you to use the GitHub actions provided by the envelope repository.
Create a new variant
We will create a new variant directly in the 'main' branch of your fork. You can, of course, work in a separate branch. If your sdkconfig may be useful for others, you should alse create a pull request to the original repository.
This step is slightly advanced. If you don't have the setup or feel overwhelmed, consider asking the Toit community for help. They might just create a PR to your forked repository with the new variant.
If you create a new variant yourself, follow the instructions in the the envelope's README.
In the remainder of this tutorial, we assume that the new variant is called "esp32-my-variant".
Push the changes to your forked repository.
Build
Go to the actions tab of your forked repository, and select the "Build" workflow (on the left).
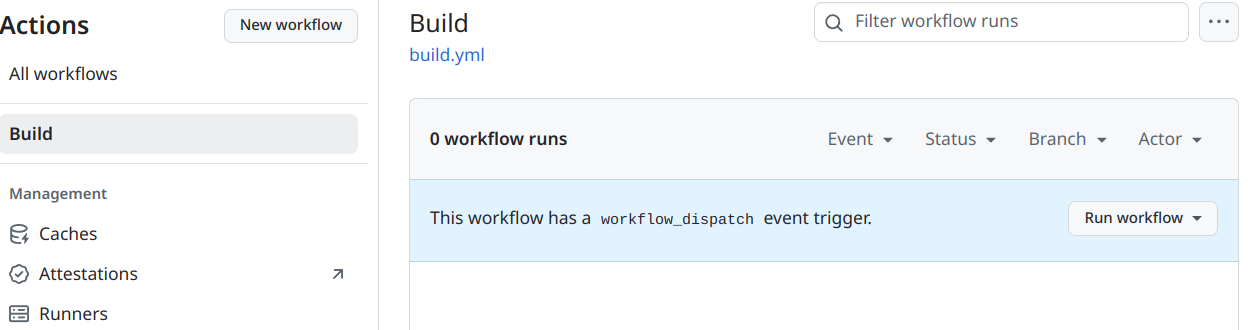
Click the "Run workflow" button, and select the branch you pushed the changes to. Fill out the form:
- Select "ESP32", and deselect "host" and "cross".
- Choose the SDK version you want to use. For this example we pick "v2.0.0-alpha.160".
- Ignore the "Branch to check out".
- Select "Upload release artifacts"
- Fill the "Variant to build", setting it to "esp32-my-variant".
- Ignore the "Link to gist ..."
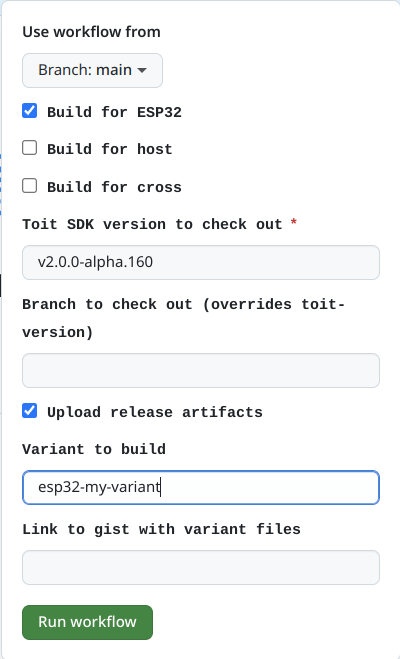
Click on "Run workflow". This triggers the build of the new envelope. You might need to reload the page to see the workflow in the list.
Once the build is done, you should have a new release in the "Releases" tab of your repository. The release version is the SDK version you selected. You should have exactly one asset, which is the new envelope.
Using the new envelope
Most of Toit tools support either an envelope as argument or even a URL to download the envelope.
Jaguar
Jaguar accepts either the envelope or the URL to the envelope. You can specify them during flashing or during "firmware update".
Make sure your SDK version is the same as the one used by Jaguar. You can check the version by running:
If the versions match you can flash a device with your custom envelope by running. You might to adjust the URL to the release you created:
jag flash https://github.com/your-owner/envelopes/releases/download/v2.0.0-alpha.160/firmware-esp32-my-variant.envelope.gz
Similarly, you can update the firmware of a device by running:
jag firmware update https://github.com/your-owner/your-repo/releases/download/v2.0.0-alpha.160/esp32-my-variant.envelope
Artemis
Artemis makes using custom envelopes even easier. Instead of manually selecting the correct version, Artemis will automatically download the correct envelope for you.
Simply add a "firmware-envelope" entry to your pod specification. Set it to the URL of your
custom envelope, replacing the SDK version with $(sdk-version).
For example:
# yaml-language-server: $schema=https://toit.io/schemas/artemis/pod-specification/v1.json

$schema: https://toit.io/schemas/artemis/pod-specification/v1.json
name: my-pod
sdk-version: v2.0.0-alpha.160
artemis-version: v0.24.0
max-offline: 0s
firmware-envelope: https://github.com/your-owner/your-repo/releases/download/$(sdk-version)/esp32-my-variant.envelope
connections:
  - type: wifi
    ssid: YOUR-SSID
    password: YOUR-PASSWORD
containers: {}
When building a pod, Artemis will replace the $(sdk-version) with the SDK version
you are using.
Artemis caches the envelopes. If you update the released envelope you need to
clear the cache located at $HOME/.cache/artemis/envelopes/github.com, so that
Artemis downloads the updated envelope again.
Staying up to date
Unfortunately, GitHub doesn't provide a way to automatically rerun the build action when a new SDK is released. You need to manually rerun the build action with the new SDK version.
Conclusion
Using GitHub actions, creating and building custom envelopes is simple and doesn't require any special setup. Once a variant is created, a few clicks are all that's needed to build the envelope.